Making your own vitamin C serum costs less than five dollars and takes about ten minutes. You’ll get the same brightening benefits as those expensive bottles at beauty counters, but with complete control over what touches your skin. Fresh ingredients mean maximum potency, and you can customize the formula for your exact needs.
Creating vitamin C serum at home requires just three ingredients: L-ascorbic acid powder, distilled water, and vegetable glycerin. Mix a 10-20% concentration for effective brightening without irritation. Store in a dark glass bottle in the refrigerator and use within two weeks for maximum potency. This simple formula delivers professional results at a fraction of retail prices.
Why homemade vitamin C serum works better than you think
Store-bought serums start oxidizing the moment they’re manufactured. That brownish tint you see in older bottles? That’s vitamin C breaking down into useless compounds.
Fresh batches maintain full potency. You’re applying the ingredient at its peak effectiveness, right when it can do the most good for your skin.
The science backs this up. L-ascorbic acid, the most studied form of vitamin C, loses stability when exposed to light, air, and time. Making small batches means you’re always working with fresh, active ingredients.
Cost matters too. A quality vitamin C serum runs $50 to $150 for one ounce. Your homemade version costs about $3 for the same amount, and you’ll have enough powder left over for months of batches.
Essential ingredients and where to find them
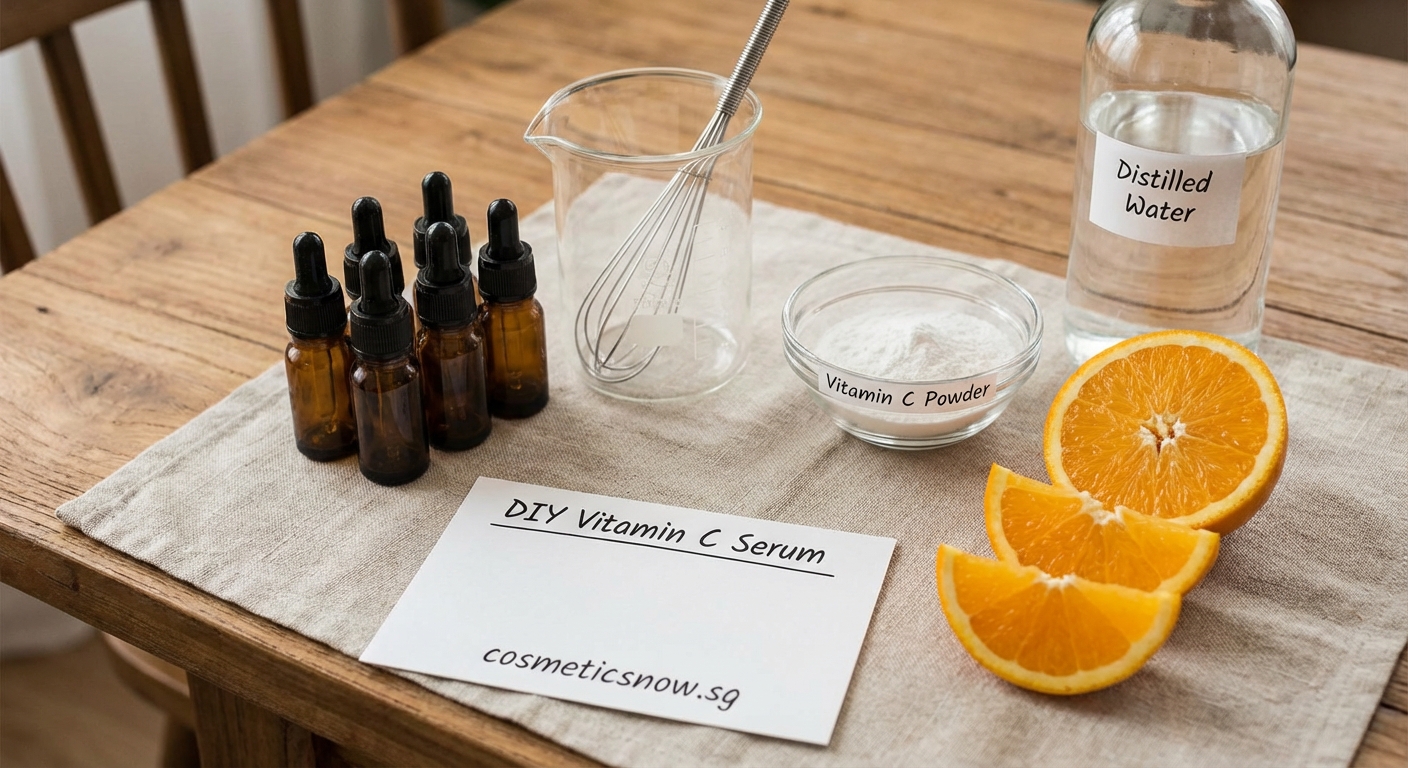
You need three things to make an effective vitamin C serum. Each ingredient plays a specific role in the formula.
L-ascorbic acid powder is pure vitamin C in its most potent form. Buy pharmaceutical or cosmetic grade powder from online beauty supply stores or health retailers. A 100-gram container costs around $15 and lasts for dozens of batches.
Distilled water serves as your base. Never use tap water. Minerals and impurities in regular water cause the vitamin C to oxidize faster. A gallon of distilled water costs less than $2 at any grocery store.
Vegetable glycerin helps the serum absorb into your skin and adds light hydration. This ingredient also extends the serum’s shelf life slightly. Find it at pharmacies, health food stores, or online for about $8 per bottle.
Optional additions include:
– Vitamin E oil for extra antioxidant protection
– Ferulic acid to stabilize the vitamin C
– Hyaluronic acid powder for deeper hydration
– Aloe vera gel for soothing properties
Start with the basic three-ingredient formula. You can experiment with additions once you understand how the base recipe works.
Step by step instructions for making your serum
Follow these exact steps for a stable, effective serum. Precision matters when working with active ingredients.
-
Sterilize all your tools and containers by boiling them for five minutes or running them through a dishwasher cycle. Any bacteria will ruin your batch.
-
Measure 1 teaspoon of L-ascorbic acid powder for a 20% concentration. Use a half teaspoon for 10% if you have sensitive skin. Pour the powder into a small dark glass bottle.
-
Add 2 tablespoons of distilled water to the bottle. The powder won’t dissolve immediately, and that’s normal.
-
Shake vigorously for 30 seconds. Let it sit for two minutes, then shake again. Repeat until the powder completely dissolves. This takes about five minutes total.
-
Add 1 teaspoon of vegetable glycerin. Shake for another 30 seconds to blend everything together.
-
Label your bottle with the date. This serum stays fresh for two weeks when stored properly.
The entire process takes less time than brewing a cup of coffee. You’ll have a fresh batch ready to use immediately.
“Fresh vitamin C serum should be completely clear or very slightly yellow. If it turns orange or brown, the vitamin C has oxidized and lost its effectiveness. Make a new batch.” – Cosmetic chemist recommendation
Getting the concentration right for your skin type
Concentration determines how effective and how irritating your serum will be. Finding your sweet spot takes a bit of trial.
| Skin Type | Recommended Concentration | Expected Results |
|---|---|---|
| Sensitive or first-time users | 5-10% | Gentle brightening, minimal irritation risk |
| Normal to combination | 15-20% | Noticeable brightening, good tolerance |
| Oily or experienced users | 20-25% | Maximum results, higher irritation potential |
| Mature or sun-damaged | 20% with ferulic acid | Enhanced collagen production, better stability |
Start conservative. You can always increase concentration in your next batch, but you can’t undo irritation from starting too strong.
Test your serum on your inner forearm first. Wait 24 hours. No redness or stinging? You’re good to use it on your face.
Some tingling is normal when you first apply vitamin C serum. It should fade within 30 seconds. Persistent burning means the concentration is too high for your skin right now.
How to store your serum for maximum freshness
Storage makes or breaks your homemade serum. Vitamin C degrades fast when exposed to light, heat, or air.
Use only dark amber or cobalt blue glass bottles. Clear glass lets light through, which destroys vitamin C within days. Plastic containers can leach chemicals that contaminate your formula.
Keep your serum in the refrigerator at all times. Cold temperatures slow oxidation significantly. The serum should feel cool when you apply it, which also helps reduce any inflammation.
Fill bottles only halfway. Less air space means less oxidation. If you’re making a larger batch, divide it between multiple small bottles and open only one at a time.
Check your serum before each use. Fresh serum looks clear to pale yellow. Discard any batch that turns orange, brown, or cloudy. These color changes mean the vitamin C has oxidized into compounds that can actually irritate your skin.
Two weeks is the maximum lifespan for homemade vitamin C serum. Mark your calendar and make fresh batches every Sunday evening. That way, you’ll always have effective serum ready for your morning routine, similar to how to build the perfect morning skincare routine in 5 simple steps.
Applying your serum the right way
Application technique affects how well the serum works. Vitamin C absorbs best on clean, slightly damp skin.
Wash your face and pat it almost dry. Your skin should feel cool and slightly moist, not dripping wet.
Dispense 3-4 drops of serum into your palm. That’s enough for your entire face. More doesn’t mean better results.
Press the serum into your skin rather than rubbing it around. Start at your cheeks and work outward. Cover your forehead, nose, and chin. Avoid the immediate eye area where skin is too delicate for pure vitamin C.
Wait three minutes before applying anything else. Vitamin C needs time to absorb and work at the right pH level. If you layer other products too fast, you dilute the serum and reduce its effectiveness.
Follow with your regular moisturizer and sunscreen. Vitamin C makes your skin more sensitive to sun damage, which is why most people apply it in the morning under SPF protection.
Use your serum once daily when you first start. After two weeks, you can increase to twice daily if your skin tolerates it well. Understanding how to properly layer your serums for maximum skin benefits helps you get the most from your DIY formula.
Common mistakes that ruin your batch
Even simple recipes can go wrong. These errors waste ingredients and leave you with ineffective serum.
Using hot water to dissolve the powder faster destroys vitamin C immediately. Stick with room temperature or cool distilled water. Patience pays off.
Making huge batches to save time seems efficient but guarantees waste. That month-old serum sitting in your bathroom has lost most of its potency. Small, fresh batches always win.
Skipping the pH test means you might be applying serum that’s too acidic. Vitamin C serum should have a pH between 2.5 and 3.5. Test strips cost less than $10 and prevent skin damage.
Storing serum in the bathroom exposes it to heat and humidity from showers. These conditions accelerate oxidation. The refrigerator is the only proper storage location.
Adding essential oils for fragrance sounds nice but can irritate skin when combined with vitamin C. Keep your formula simple. Save the aromatherapy for other products.
Not washing hands before mixing introduces bacteria that spoil your batch. Clean hands and sterilized tools are non-negotiable.
Forgetting to label bottles leads to confusion about batch age. Always write the date on every bottle you make.
Customizing your formula for specific skin concerns
The basic recipe works great, but you can modify it for targeted results. These additions address common skin issues.
For extra anti-aging benefits, add 1/4 teaspoon of ferulic acid powder to your formula. This ingredient stabilizes vitamin C and boosts its collagen-building effects. Your serum will stay fresh slightly longer too.
Hyperpigmentation responds well to 1/2 teaspoon of niacinamide powder mixed into your batch. This combination fades dark spots faster than vitamin C alone.
Dry skin types benefit from replacing half the distilled water with hyaluronic acid serum. Your formula becomes more hydrating while maintaining the same vitamin C concentration.
Acne-prone skin does better with a lighter formula. Reduce glycerin to 1/2 teaspoon and add 1/4 teaspoon of witch hazel. This prevents any heavy feeling that might clog pores.
Sensitive skin needs extra soothing. Replace 1 tablespoon of distilled water with pure aloe vera juice. The anti-inflammatory properties help prevent redness.
Test each modification separately. Change only one variable per batch. That way, you’ll know exactly what works for your skin and what doesn’t.
Comparing costs with store-bought options
The price difference between DIY and retail vitamin C serums is staggering. Let’s break down the real numbers.
A popular 1-ounce vitamin C serum from a major beauty brand costs $75. You get 30 milliliters of product that starts degrading the moment you open it.
Your homemade version costs:
– L-ascorbic acid powder: $0.50 per batch
– Distilled water: $0.05 per batch
– Vegetable glycerin: $0.25 per batch
– Dark glass bottle: $2.00 (reusable)
Total first batch: $2.80
Subsequent batches: $0.80 each
You’re saving $74 per ounce compared to retail. Make one batch every two weeks for a year, and you’ll save over $1,800.
Those savings let you invest in other parts of your skincare routine. Maybe you splurge on a better moisturizer or finally try that retinol product you’ve been eyeing.
The quality matches or exceeds expensive brands because your serum is always fresh. Department store serums sit in warehouses and on shelves for months before you buy them. Yours is made on demand.
Signs your serum is working
Vitamin C serum produces visible results, but not overnight. Understanding the timeline helps you stay consistent.
Week one: Your skin looks slightly brighter. The effect is subtle, like you got better sleep. Old makeup might look better on your face because your skin tone is more even.
Week two: Small dark spots start fading around the edges. Sun damage becomes less obvious. Your complexion looks fresher in natural light.
Week four: Friends ask if you’ve done something different with your skincare. Fine lines around your eyes and mouth appear softer. Your skin feels firmer when you wash your face.
Week eight: Significant improvement in overall brightness and tone. Dark spots have faded noticeably. Your skin texture feels smoother. Pores look smaller because your skin is properly hydrated and healthy.
Week twelve: Maximum results achieved. Your skin maintains its improved appearance as long as you continue using the serum. Take photos every two weeks to track changes you might not notice day to day.
Some people see faster results. Others need the full twelve weeks. Consistency matters more than anything else. Missing days here and there slows your progress significantly.
Troubleshooting irritation and sensitivity
Even natural ingredients can cause reactions. Knowing how to respond prevents lasting damage.
Mild tingling for 30 seconds after application is normal. Your skin is adjusting to the active ingredient. This sensation typically disappears after a week of regular use.
Persistent stinging means your concentration is too high. Dilute your current batch by adding equal parts distilled water. Use this weaker formula until your skin adjusts, then make a fresh batch at your target concentration.
Redness that lasts more than five minutes indicates irritation. Stop using the serum immediately. Apply a gentle moisturizer and give your skin three days to recover. When you restart, use a 5% concentration and build up slowly.
Dry, flaky patches mean you’re using the serum too frequently. Cut back to every other day. Add more glycerin to your formula for extra hydration.
Breakouts during the first two weeks might be purging. Vitamin C increases cell turnover, bringing congestion to the surface faster. If breakouts continue past week three or get worse, your skin doesn’t tolerate vitamin C well. Try a different active ingredient instead.
Always patch test new batches. Even if you’ve made the recipe before, slight variations in mixing or ingredients can affect how your skin responds.
Pairing your serum with other skincare products
Vitamin C plays well with most ingredients, but some combinations work better than others. Timing and order matter for maximum benefits.
Apply vitamin C serum first after cleansing. Its low pH needs direct contact with skin to work properly. Wait three minutes before adding anything else.
Hyaluronic acid goes on next. This ingredient helps lock in the vitamin C and adds hydration. Your skin will feel plumper and look dewier.
Niacinamide can be used with vitamin C despite old myths saying they cancel each other out. Modern research shows they actually work together to brighten skin and reduce inflammation.
Retinol should be used at night, not with morning vitamin C application. Both ingredients are powerful, and using them together can cause excessive irritation. Alternate them for best results, as explained in how to build a nighttime skincare routine for every skin type.
Sunscreen is mandatory. Vitamin C makes your skin more vulnerable to UV damage. Apply SPF 30 or higher every single morning, even on cloudy days.
AHA or BHA exfoliants should be used on different days than vitamin C when you first start. After your skin adjusts, you can use them together, but watch for irritation.
Making vitamin C serum part of your routine
Consistency turns good ingredients into great results. Building the right habits ensures you actually use what you make.
Set a specific time for application. Most people choose morning because vitamin C provides antioxidant protection throughout the day. Your routine becomes automatic when it happens at the same time daily.
Keep your serum visible. Store it in the front of your refrigerator where you’ll see it every morning. Out of sight means out of mind, and forgotten serum doesn’t help your skin.
Make fresh batches on a schedule. Sunday evenings work well for most people. You’re preparing for the week ahead, and making serum takes less time than meal prep.
Track your progress with photos. Take one picture per week in the same lighting, same angle. You’ll see changes that aren’t obvious in the mirror.
Pair serum application with an existing habit. Right after brushing your teeth works perfectly. The routine is already established, so adding one more step feels natural.
Tell someone about your new routine. Accountability helps you stick with it during the first month when results aren’t dramatic yet. After that, visible improvements provide their own motivation.
When to upgrade your formula
The basic three-ingredient serum works beautifully, but you might want more as your skin adjusts. These signs indicate you’re ready for advanced formulas.
Your skin tolerates 20% concentration without any irritation. You’ve been using the basic formula for at least two months. Your results have plateaued, and you want to push further.
Adding ferulic acid makes sense now. This ingredient doubles vitamin C’s effectiveness and extends shelf life to three weeks. The combination produces faster, more dramatic results.
Vitamin E oil becomes valuable for mature skin. It works synergistically with vitamin C to fight free radical damage and improve skin texture.
Hyaluronic acid powder addresses dryness that sometimes develops with long-term vitamin C use. Your skin stays bright without feeling tight or uncomfortable.
Advanced formulas require more precise measurements and better technique. Invest in a small digital scale that measures to 0.01 grams. Accuracy matters more with complex recipes.
Consider making separate serums for different concerns rather than one complicated formula. A simple vitamin C serum for morning, a retinol serum for evening. Specialized products often work better than all-in-one solutions.
Your path to brighter, healthier skin starts now
Making your own vitamin C serum puts professional-grade skincare in your hands at a fraction of retail costs. You control every ingredient, ensure maximum freshness, and customize formulas for your exact needs.
Start with the basic three-ingredient recipe tonight. Mix your first batch, store it properly, and commit to daily application for eight weeks. Take before photos so you can see the transformation happening gradually.
Your skin will thank you with a brighter, more even complexion that makes you feel confident going makeup-free. That’s the real power of fresh, effective skincare made in your own kitchen.