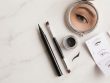
A smoky eye can feel like the holy grail of makeup looks. It is sultry, dramatic, and instantly makes your eyes the center of attention. But if you have ever tried to blend that dark shadow only to end up with a muddy mess, you know the frustration. The good news is that you do not need a pro artist or a 30-minute window. This 5 minute smokey eye tutorial breaks down the process into simple steps that anyone can follow, whether you are rushing to a dinner date or just want to add some drama to your daily look.
A 5 minute smokey eye is absolutely achievable with the right technique. Focus on using a neutral base shade, a single dark shadow, and a fluffy blending brush. The secret is layering product gradually and using a clean brush to soften edges. Skip the liner for speed and let the shadow do the work. This method works for any eye shape and color.
Why a 5 Minute Smokey Eye Works for Everyone
Many people think a smoky eye requires a ton of products and time. In reality, the classic look relies more on technique than on a long list of shadows. By limiting your tools to just two or three shades, you cut down on decision fatigue. You also reduce the risk of over-blending, which is the main culprit behind a messy eye.
This approach is especially helpful for beginners. You do not need to master complicated cut-crease methods or worry about perfect winged liner. The 5 minute smokey eye tutorial focuses on one core skill: blending. Once you get that down, you can apply it to any color palette.
The Essential Tools and Products
Before you start, gather these items. Keeping it minimal is the key to staying under the five-minute mark.
- One neutral matte shadow (close to your skin tone or slightly warmer)
- One deep shade (charcoal, brown, navy, or plum)
- A fluffy blending brush (this is non-negotiable)
- A flat shader brush (for packing on color)
- Mascara (waterproof is a good idea to prevent smudging)
- Optional: concealer or eye primer
If you have a primer, use it. It helps the shadow grip and last longer. But if you are in a rush, a dab of concealer on the lid works just as well. For more on building a solid base for your whole face, check out our guide on how to apply foundation like a professional makeup artist.
The Step-by-Step 5 Minute Smokey Eye Tutorial
Follow these steps in order. Set a timer if you want to challenge yourself. You will be surprised how fast you can move once you know the pattern.
-
Prime the lid. Use a tiny amount of concealer or primer all over the eyelid up to the brow bone. Blend it out with your ring finger. This takes 20 seconds.
-
Set with neutral shadow. Take your fluffy brush and sweep the matte neutral shade all over the lid. This creates a smooth canvas and helps the dark shadow blend later. Done in 30 seconds.
-
Apply the dark shade. Dip your flat shader brush into the deep shadow. Tap off any excess. Press the color onto the outer corner of your eye, right where your lash line meets the crease. Do not drag it across the whole lid. Keep it concentrated. This takes 45 seconds.
-
Blend, blend, blend. This is the most important step. Using a clean fluffy brush (or the same one if you wiped it), make small circular motions at the edge of the dark shadow. Work inward toward the center of the lid. The goal is to soften that harsh line, not to move the color all over. Spend about 90 seconds on this.
-
Add a touch to the lower lash line. Use the same flat brush with the remaining product on it. Gently press it along the outer half of your lower lash line. Blend it with your finger or a small brush. This step takes 30 seconds.
-
Apply mascara. Coat your upper lashes with two layers. If you have time, give the lower lashes a light coat. This step takes 60 seconds.
That is roughly five minutes total. The entire process relies on keeping your movements focused and your brushes clean. If you struggle with liner, skip it entirely. The shadow itself creates enough definition. For more help with eye makeup, you might like our guide on winged eyeliner for beginners: 3 foolproof methods that actually work.
Common Mistakes and How to Fix Them
Even with a simple method, things can go wrong. Here is a table that shows the most frequent issues and how to correct them.
| Mistake | Why It Happens | The Fix |
|---|---|---|
| Muddy, gray color | Using too many dark shades at once | Stick to one dark color. Add depth with more layers, not more colors. |
| Harsh line at the crease | Not blending enough or using a dense brush | Use a fluffy brush and blend in circles. A clean brush picks up excess pigment. |
| Shadow falls onto the cheeks | Applying too much product or tapping the brush | Always tap off excess shadow before applying. Hold a tissue under the eye. |
| Eye looks smaller | Dark shadow placed too far inward | Keep dark color on the outer third of the eye. Leave the inner corner lighter. |
| Look fades after an hour | No primer or base shadow | Always use a primer or concealer. Set it with a neutral shadow before adding dark color. |
Choosing the Right Color for Your Eye Shade
One of the best things about a 5 minute smokey eye is that it works with almost any color. But certain shades make your eye color pop more.
- Brown eyes: Deep purples, bronze, charcoal, and navy blue all look stunning. They add warmth and contrast.
- Blue eyes: Warm browns, taupes, and coppers create a beautiful contrast. Avoid going too gray, which can wash you out.
- Green or hazel eyes: Plum, burgundy, and olive green are your friends. These shades bring out the gold and green flecks in your iris.
- Hazel eyes: Almost anything works, but bronze and champagne tones are especially flattering.
If you have hooded eyes, you might need to adjust the placement slightly. Apply the dark shadow slightly higher in the crease so it is visible when your eyes are open. Our article on 7 game-changing makeup tricks for hooded eyes that actually work offers more specific tips.
The Tools That Make a Difference
You do not need expensive brushes, but the right shape matters. Here is a bulleted list of what to look for:
- A fluffy blending brush with soft, tapered bristles. This is your main tool for softening edges.
- A flat shader brush that is firm but not stiff. It helps pack color exactly where you want it.
- A small pencil brush for the lower lash line. This adds precision without going overboard.
- Cotton swabs for cleaning up edges. Keep a few handy for mistakes.
Expert tip from professional makeup artists: “Always use a windshield wiper motion when blending the crease. Back and forth, not circular, keeps the color from moving too high up the brow bone.”
How to Speed Up the Process Even More
If five minutes still feels like a stretch, try these shortcuts.
- Use a cream shadow stick instead of powder. You can blend it with your fingers in seconds.
- Skip the lower lash line entirely. The look will still be dramatic.
- Apply mascara before the shadow. If you make a mistake, the shadow covers the smudge.
- Keep a single palette with a neutral and a dark shade in your bag. No need to dig through drawers.
A 5 minute smokey eye tutorial is about efficiency. The more you practice the steps, the faster you will get. Soon, you will be able to do it in your car at a stoplight (though we do not recommend driving while applying makeup).
When to Wear This Look
This style is versatile. You can wear it for:
- A night out with friends
- A date night
- A holiday party
- A video call where you want to look polished
- Any day you feel like adding a little edge
Pair it with a nude lip and a bit of highlighter for balance. If you want to keep the rest of your face minimal, that is the best way to let the eyes shine. For a complete face routine, see our guide on the 5-minute morning beauty routine that actually works.
Your 5 Minute Smokey Eye Routine
Here is a final recap to keep in your mental toolkit.
- Prep: Primer or concealer on the lid.
- Base: Neutral matte shadow all over.
- Focus: Dark shadow on the outer third.
- Blend: Soften edges with a fluffy brush.
- Finish: Mascara on top and bottom lashes.
That is it. No complicated layering. No need for a dozen brushes. Just a simple, repeatable process that delivers results. The more you do it, the more intuitive it becomes. You will start to notice how much pressure to apply, how far to blend, and which colors suit you best.
Master the Look and Make It Your Own
A 5 minute smokey eye is not a compromise. It is a smart technique that saves time while still delivering a gorgeous result. Once you master the basic steps, you can experiment with different colors, finishes, and intensities. Add a pop of shimmer in the center of the lid for a night out. Use a matte brown for a softer daytime version. The framework stays the same.
Remember to remove your makeup gently at the end of the day. The right removal method keeps your skin healthy and your eyes happy. You can learn more in our article on the right way to remove makeup without damaging your skin.
Now grab your brush and give it a try. Set a timer. See how close you can get to five minutes. The first attempt might take a little longer, but by the third time, you will have the motions memorized. That is the beauty of a good technique: it stays with you.