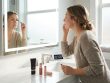
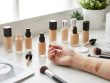
You don’t need a $400 machine to get that smooth, poreless look that makeup artists create on set. The secret to an airbrushed finish at home is all about prep, technique, and the right products. Whether you are getting ready for a Zoom call or a night out, these steps will help your foundation look like second skin.
An airbrushed finish comes from smooth skin, thin layers, and the right application motion. Start with a hydrated base, use a damp sponge or a dense brush, and apply foundation in thin, stippling motions. Avoid heavy powders; set with a fine mist instead. The result is a natural, second-skin look that lasts all day.
Why That Airbrushed Look Feels So Elusive
Most people think you need an actual airbrush gun. That is not true. The effect is about how light hits your skin. You want a soft, even layer that blurs imperfections without looking thick or cakey. The good news? You already have everything you need in your bathroom.
Let’s break down the real steps. No fluff.
Step 1: Smooth the Canvas
You cannot get a flawless finish on dry, flaky skin. That is rule number one.
Before foundation even touches your face, you need to hydrate and prime. If you want to learn more about the exact order of skincare products, check out the complete step-by-step guide to building your first skincare routine.
Here is what to do:
- Wash your face with a gentle cleanser. Pat dry.
- Apply a lightweight moisturizer. Give it 2 minutes to sink in.
- Use a primer that matches your skin type. For oily skin, go mattifying. For dry skin, pick a hydrating one.
- Wait another 60 seconds before foundation.
“Hydration is the number one secret to an airbrushed finish. If your skin is plump, foundation sits on top like a dream. If it’s dry, product grabs onto every texture.” – Professional makeup artist Jenna Torres
Step 2: Choose the Right Formula
Not all foundations are created equal for the airbrushed look. You want something buildable and medium coverage. Thin liquids and skin tints work better than thick, full-coverage creams.
Here is a quick comparison:
| Technique | Common Mistake | Why It Matters |
|---|---|---|
| Use a damp sponge in stippling motion | Swiping or dragging the sponge | Swiping moves product around and highlights pores |
| Apply foundation in thin layers | Pumping too much product at once | Thick layers settle into fine lines |
| Set with a translucent powder only where needed | Baking the entire face with heavy powder | Excess powder creates a flat, unnatural look |
| Finish with a setting mist | Skipping the mist for a matte look | A mist melts layers together for a seamless finish |
Step 3: Apply in Thin Layers (The Real Magic)
This is the part most people skip. Layering is everything.
- Start with one pump of foundation on the back of your hand.
- Dip your damp sponge (or a dense stippling brush) into the product.
- Tap the sponge onto your skin in a bouncing motion. Start from the center of your face and move outward.
- If you need more coverage, wait 30 seconds. Then add a second thin layer only where needed (around the nose, on blemishes).
- Do not touch your face again until you apply powder and setting spray.
The key is “bounce, bounce, bounce.” That motion pushes product into the skin instead of leaving it on top. If you want more detailed application tips, read how to apply foundation like a professional makeup artist.
Step 4: Conceal Strategically
After foundation, look in a mirror with natural light. You will see spots that still need help. Use a small, pointed brush to dab concealer only on those spots.
- Use concealer that matches your foundation exactly.
- Blend with your ring finger to avoid moving the foundation underneath.
- Do not put concealer all over your under eyes if you have texture there.
Step 5: Set the Right Way
This step makes or breaks the airbrushed look.
- Use a finely milled translucent powder. Apply with a fluffy brush, not a puff.
- Focus on the T-zone (forehead, nose, chin). Leave the cheeks mostly untouched.
- Let the powder sit for 30 seconds, then dust off the excess with a clean brush.
- Finish with a setting spray that has a dewy or natural finish. Hold the bottle 8 inches away and mist in an “X” and “T” shape.
The setting spray is the secret weapon. It melts the powder into the foundation, giving you that smooth, camera-ready finish without looking dry.
Common Mistakes That Kill the Look
Here is a list of things to avoid if you want to master how to get an airbrushed finish at home:
- Using too much product. Less is always more.
- Applying foundation with your fingers (unless you are using a skin tint).
- Skipping primer. It is the glue that holds everything together.
- Using a sponge that is too dry. Dampen it until it is about twice its dry size.
- Forgetting your neck. A flawless face with a mismatched neck is a dead giveaway.
Tools That Make a Difference
You do not need a pro kit, but a few tools help:
- A damp beauty sponge (Real Techniques or Beautyblender are great)
- A dense, flat-top foundation brush for stippling
- A large, fluffy powder brush
- A good setting mist (try the ones from Morphe or NYX)
The 5-Minute Version for Busy Mornings
Some days you just do not have time. Here is an even faster routine that still gives an airbrushed look:
- Moisturize and prime (1 minute)
- Mix one pump of foundation with a drop of primer on your hand (30 seconds)
- Stipple onto skin with a damp sponge (2 minutes)
- Spot conceal with your finger (30 seconds)
- Set with powder on T-zone only (30 seconds)
- Mist with setting spray (30 seconds)
That’s it. Five minutes, and your skin looks smooth and even.
Bringing It All Together
An airbrushed finish is not about expensive equipment or complicated techniques. It is about prepping your skin, applying thin layers with the right motion, and setting with a light hand. Once you practice bouncing that sponge and waiting between layers, you will wonder why you ever struggled with cakey foundation.
So grab your sponge, hydrate that skin, and try the method tonight. You will see the difference immediately. And if you want to go even deeper into skincare prep, do not miss the complete step-by-step guide to building your first skincare routine. That base is half the battle.